Aircraft engine failure in flight require a precise and timely response.
While it’s true aircraft engine failures are rare, I have been at my home airport twice in the last two years when another aircraft’s engine failed—resulting in fatalities both times. The caveat here is that both engine failures occurred shortly after takeoff, surely the worst time. One pilot attempted to return to the runway, while the other continued straight ahead to a golf course. You shouldn’t have to witness this type of thing to know you must react properly to land safely after the engine fails.
Most people in an aircraft engine failure situation find themselves in a state of disbelief. The important thing is to keep it momentary and do the right things quickly, so the flight ends safely, even if the aircraft suffers damage. There’s a short list of things to commit to deep, long-term memory so they’re available to a brain flooded with adrenaline.
Six Immediate Actions To Take in the Case of An Aircraft Engine Failure
The first three items should all be done, or at least begun, within seconds:
- Fly the airplane as you immediately apply full carb heat (if carburetor equipped) and/or check fuel on both or switch fuel tanks, hit fuel boost or pump, and mixture full rich.
- Point it toward a landing site.
- Establish best-glide airspeed.
- Next, if you’ve got enough altitude, which equals time, confirm the failure.
- Follow appropriate restart procedures for your aircraft.
- Finally, if the restart fails, then you’ll land the aircraft without power.
Step 1 – Carb Heat and Fuel
If you are flying very close to the ground you may only have time to do #1 above, which can be done in about three seconds with practice, but you must also maintain controlled flight while possibly steering slightly towards the safest landing area. Practice those hand movements on the ground and then at altitude with a safety pilot until they become second nature.
If the failure occurs shortly after takeoff, when you are climbing out, it can be surprising just how much you have to push the yoke forward to maintain best glide speed and avoid a stall. It’s an excellent thing to practice, repeatedly, at a safe altitude and perhaps with an instructor on board. I did this while earning a seaplane rating in a float-equipped Super Cub, except that the instructor would pull the power shortly after a real takeoff when we were about 100 feet up, and I would land on the water without power, and then he’d push in the power again and I’d take off and do it again.
On the other hand, at cruise, it can be surprising (depending on aircraft type) how much you have to haul back on the yoke to keep from diving when thrust is gone. Maintain altitude while the plane decelerates toward best-glide speed (more on that below). At the same time, quickly reach over and switch fuel tanks and/or hit the fuel boost pump (check your POH, your exact movements and choices depend on your aircraft). Many aircraft engine failures can be immediately corrected this way. Perhaps you’ve drained one fuel tank, or one line is plugged. This only takes a moment and is always worth trying quickly.
Step 2 – Choosing a Forced Landing Site
The prepared pilot always has the possibility of a forced landing in the back of his mind—if you do, you’ll immediately know where to turn. Otherwise, you need to decide now. Situational awareness is critical, particularly at night or in IMC. If a GPS is unavailable or turbulence prevents much button-pushing, maintain altitude, turn away from mountains (if any) and ask ATC for help. This is another reason why it’s always good to be in contact with ATC, either on an instrument plan or with VFR flight following: you’re already on the right frequency, and the controller already knows who you are.
A runway is preferable, but one may not be available within your gliding distance, something you can estimate quickly if you know how quickly your plane descends properly configured and at best glide speed (also see below). What are the winds? The prepared pilot is always keeping track during a flight. If you’re between two potential landing spots sometimes it’s actually best to head in the direction that gives you a tailwind, even if the destination is slightly farther away. ATC can help with this as well, but the choice is yours as PIC.
If no airport is close enough, look for a road, which can be as good as a runway. We were once forced to land on a remote desert road due to severe weather. We had power and thus the ability to check the road for hazards, including wires, signs, and auto traffic. After pulling off and shutting down, we used a cell phone to call weather and report our situation to the FAA, which, once confirming no injuries or property damage nor future takeoff obstructions, cleared us to depart on our own after the weather cleared, which we did.
Lacking power you will not have the luxury of approaching the road to check for obstructions and then flying away if you find them. Wires are very difficult to see from above, so look to see if there are buildings, poles, or trees adjacent to the road. If so, assume there will be wires as well. Stay above all power pylons to be safe from wires.
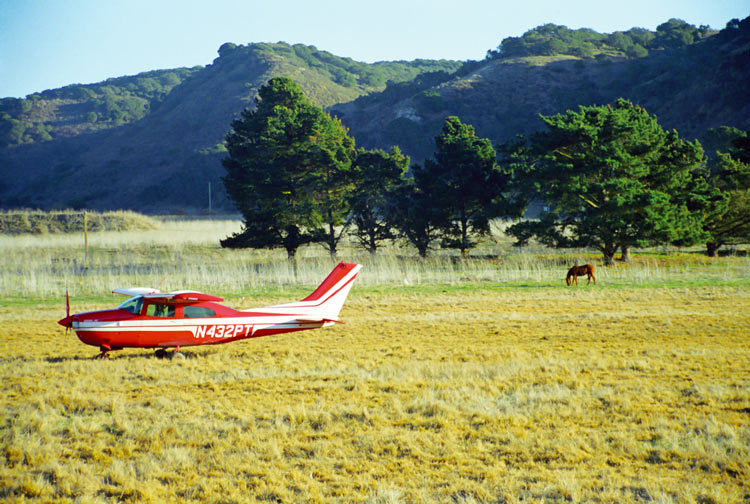
If there’s no airport or safe road within reach, search for the biggest, flattest field within range, preferably unplanted or with low plants. Assume all fields are surrounded by wires, so you can’t roll across different crops—there may be an invisible wire fence between. It’s almost impossible to determine slope from above, but a detectable slope will be too steep to land downhill, so land uphill. Every second counts, so make your decision quickly, stick with it, then establish and maintain best-glide speed.
Step 3 – Establish Best Glide Speed
Like maneuvering speed, best-glide speed is a figure that declines with declining aircraft weight and is published in your POH at full gross. Since you won’t be at full gross unless you took off over gross weight, best-glide will be lower than the published figure. I made a little chart for my kneeboard, using the old rule of thumb that best-glide speed declines 2% per 100 pounds. Review your chart occasionally in case you don’t have time to pull it out during the real thing. And just like it’s a good idea to look around during cruise, imagining where you would land if the engine failed now, you should also roughly keep track of your aircraft’s weight as you fly along, based on takeoff weight minus fuel burned.
Part of the best-glide procedure should be to clean up the airplane: flaps and landing gear retracted, cowl flaps closed, rudder trimmed. With a variable-pitch prop, pull back the prop to as slow a speed as possible. Years ago, as part of establishing power settings in typical configurations and generally getting to know our then-newly-purchased Cessna 210, we discovered that, with the aircraft clean, at idle, and best-glide speed, pulling back the prop reduced drag so we could trim up, lowering the descent rate from 2000 to 900 fpm, a difference of 1100 fpm.
Years later when we replaced the prop with a shorter, modern prop with less drag, the difference was only 750 fpm, but still significant. We also learned the big gear doors act as excellent speed brakes, increasing the descent 1200 fpm. Try this prop exercise yourself (another great excuse to go flying) at a safe altitude, and assuming the engine has cooled and the airspace is clear. You can also use this time to determine an approximate descent rate for your plane, to help determine gliding range should an aircraft engine failure happen to you.
Step 4 – Confirm the Aircraft Engine Failure
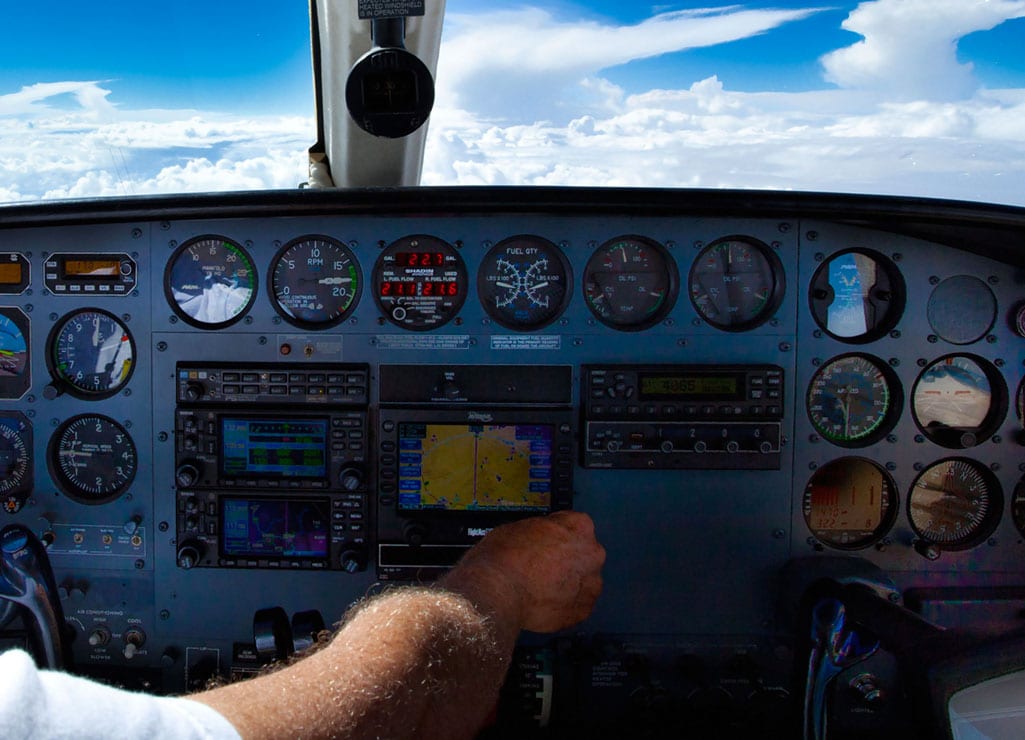
You are now flying your airplane under control, have it pointed toward your chosen landing site, and the airplane is either at or on its way to stabilizing at best glide speed. Has the engine actually completely failed? If the engine isn’t developing power, the EGT will reflect that right away. For turbocharged engines, the turbine inlet temperature (TIT) gauge will also plummet if the engine’s not developing power. Even if you lost just one cylinder, chances are the power loss will be reflected with an ordinary EGT or TIT gauge, if not as dramatically. Those fortunate enough to have individual cylinder monitors can quickly see if just one or all cylinders have failed. If you can confirm that you have partial power, re-evaluate your situation to see if you can hold enough altitude to get to the nearest airport. Otherwise, continue toward your selected landing spot.
Step 5 – Follow the Appropriate Aircraft Engine Restart Procedures
You should always know your engine re-start procedures for the aircraft you are in, and should have the emergency checklist handy as a backup. Your POH is the detailed authority as to exact steps and in which order, but there are general guidelines in addition to the initial carb heat and/or fuel selector and full-rich mixture actions described above.
Basically, your engine needs air, fuel, and ignition. For air, re-check that carb heat is on full and leave it on; in fuel-injected planes, activate alternate air. For fuel, re-verify the selector is set to BOTH, or switch tanks if your airplane has independently selectable fuel tanks, and turn on the auxiliary pump (off if that doesn’t work or it will flood). Re-verify you’re on full rich; if this doesn’t help, lean slowly to see if the engine will run at another setting. Similarly, you should be at full throttle, but then try and see if another throttle setting helps. Does the throttle feel normal? Sometimes the cables break. For ignition, check magnetos on BOTH, and then try each one separately. As a last resort, you can even pull the key out, put it back in, and jiggle it.
Step 6 – Forced Landing Procedures
If the restart is unsuccessful, it’s time to look ahead to the landing. Best glide and a clean plane give you best range. If you have time, notify ATC what’s going on. Hopefully you already have them on freq; otherwise, you can make a Mayday call and give your position on 121.5 MHz. Even if you’re in a remote area there’s a good chance an airliner might hear you and pass on your message; they monitor 121.5. ATC will send help to your approximate landing zone. But flying the plane and making a controlled landing is the most important thing.
Have passengers find pillows or jackets to protect faces just before landing. Make sure all seat belts are tight, with shoulder harnesses secured, and that passengers have reviewed how to quickly remove them after touchdown.
If you’re landing on a road where vehicles are present, like on a freeway, for instance, land with the traffic, not against it. Cars won’t see you as you descend behind them, but even at your slow speed, you’ll probably be traveling faster than they are, and as you appear in front of them, they’ll have a better chance to stop, since you’ll still be flying in front of them shortly before your touchdown. Opposing traffic usually won’t be able to get out of your way.
If you’re landing in a field, remember to assume all fields are surrounded by wires, and you don’t want to roll across different crops at high speed—there may be an invisible wire fence between. If plowed, you want to land parallel with the furrows, and low crops are vastly preferable to something like tall corn. It’s almost impossible to determine slope from above, but a detectable slope will be too steep to land downhill, so land uphill. Unfortunately, you may find your situation does not allow for all these choices, and will have to make do. If you arrive overhead and you’re too high, spiral down, still at best glide, and then try to fly a pattern as normal as possible. Here’s where those idle-engine practice approaches you’ve done—hopefully—pay off. Look for holes or obstructions on downwind.
Turning final, slow to descend as slowly as possible, then switch off the fuel selector (so you don’t reach down when you’re too close to the ground), pull both the throttle and the mixture (if equipped), and unlatch doors. Aim far enough into the field to avoid possible unseen wires. It’s better to roll out too far and hit something at the end, at a slow speed, than to hit something earlier and faster.
Whether to extend the gear is a matter of debate, but often in a rough or soft field or on taller crops the gear will catch, cause an immediate deceleration with high G-forces, and flip the plane. On a smoother surface, the gear should come down on final. With the field made, extend flaps, and then turn off the battery and alternator. Flare over the top of crops, not into them. Touchdown should be as slow as possible, both horizontally and vertically, with wings level.
Once you’ve stopped, exit quickly and move away in case of fire. Even with no fuel leaks or electrical problems, a hot exhaust pipe could ignite a fire simply because the airplane is sitting on dry leaves, for example.
In Conclusion
Most forced landings after an aircraft engine failure end without fatalities or major injuries. You want to turn the numbers in your favor so that even if your insurance company ends up buying your airplane, you and your passengers all live to fly another day.
Featured Image: George A. Kounis / www.pilotgetaways.com



This is a very good explanation. Very easy to read and understand. Thank you for your time and keep up the good work!
I have it ingrained in my head:
Fly (the plane)
Pick (a spot to land)
Plan (plan the approach)
Causes (look for causes to the engine failure for a possible restart)
Communicate (mayday call if no engine restart available)
Calm (the passenger)
Mags and Fuel Off
Open door (and push down handle to keep it from latching shut)
But for right after take off – Fly, Pick, Land