These 5 rules will help aviators and aviation enthusiasts alike to take great aviation photos.
Photography can be a very rewarding or very frustrating experience. You snap a photo and you immediately want to look at it and see the great image you just captured. With your minds eye squarely fixed on how other people’s accolades will rain down upon you for taking such an emotional image – you look it over and judge yourself. The resulting feeling you get is almost never good.
I began taking photos in 1992 with 35mm black and white film on a completely manual camera. The digital revolution in still cameras had not yet really broke.
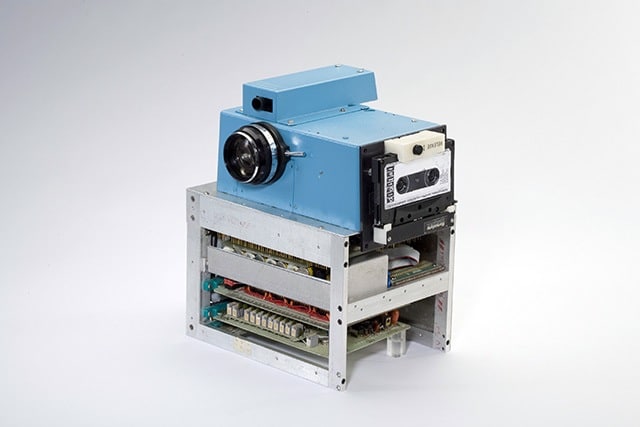
Technically, the first digital still camera was born in 1975:
I’m not gonna go into the differences between film and digital, nor will I try and interest you with a history lesson on the evolution of the still camera. Instead, let’s jump right along into the meat and potatoes.
The Icicle and the Rose Petal
When you first whip out that camera you want to take pictures of “dramatic things”. For most of the beginners (and I mean like 95%) that translates into a close up of a rose petal and or a dripping icicle. The remaining 5% take pictures (or try) of an old man’s face shrouded in black. For aviation enthusiasts, this reveals as the classic shot of a wing strut and the scenery below. I took many pictures of icicles in macro and bees hovering over a rose petal. I was troubled by all the results I got. I began to suspect I just wasn’t one of those creative people born with “the gift”.
Well, I REALLY wanted to be good at photography, so I dug into rules of composition, line, and texture; graduated to color film; got better equipment; etc. It seemed that no matter how much my camera cost, what type of film I bought, how detailed and painstakingly patient I was… my icicle was always just boring.
This was depressing because it didn’t seem to matter how much about photography I learned I wasn’t getting any better. This reinforced the notion that creative talent is something you either have or you don’t. I didn’t realize that in photography, as in most creative endeavors, honesty and a bit of sincere reflection was the key to success.
Simplified down the lesson I learned and the precursor to all the compositional rules and technical aspects of photography came down to a simple principle: when you line that camera up, be it a Hasselblad or an iPhone, if you are trying to be creative, and most of us are, you will surely fail.
Rule 1 for Great Aviation Photos: If you don’t see something interesting about what you are trying to take a picture of, no one else will either.
You have to really know what inspires you about the thing you are considering taking a photo of. Put another way, you have to know what it is you really care about before you can know what to photograph.
This sounds like a “no-brainer”, but let me give you an example: Have you ever taken a picture of your meal? If the answer is yes, then this rule is for you. No one, not even you, cares what you ate. You may be excited about a cool dining experience, but try and boil that down (pun intended) to what you actually care about sharing. Is it what’s on the plate, or you having the experience of what’s on that plate? The latter right? So a picture you might care about would be your bloated face stuffing food into your already full mouth while trying to grin and take a “selfie”, all the makings of a great picture.
It’s from this simple place (understanding what to photograph) that all the rules of composition, line, texture, the rules thirds, the Golden Mean, and all that other stuff begins to apply. This is also where the fun really begins.
Rule 2 for Great Aviation Photos: Lighting isn’t everything – Focus is.
So many times I’ve heard people say that if you take a photo in good light then 90% of the job is done for you. That’s false. Good lighting is a major tool in taking a photo, but I can tell you that some of the best photos I’ve ever taken were in poor lighting. No, the biggest single thing you can do to ensure a photo is usable (once you know what to take a photo of – ie, something you care about) is making sure it’s in focus, SHARP focus.
Here are some tips:
- Overexpose during focus
Yeah… before you click that shutter release, open the aperture up until you can barely see the outlines of your subject in the picture. Then spin the focus ring until they become the most visible and stop the aperture back down. Works like a charm.
-Focus past your subject, and then roll back to your focus point
Sometimes you can see the real point of sharp focus until you really lose it. So get in the habit of rolling your focus past the point of sharpness (slowly) and pay attention the when you think it’s sharpest on your way past it, then when it seems sharpest on your way back.
- Don’t crop in
Cropping into an image is a popular thing these days… Composing a shot “later” is often easier than taking a properly framed image now. When you do this, you lose your sharpness and adding a sharpen filter later is kind of a hack. If your goal is to become a better photographer, then you need to be weary of getting into the habit of cropping to find your image later. The best images are sharp and wonderfully textured, both of which is diminished to a small or large degree when you crop in. I think of cropping like training wheels, you should only use it till you don’t need it any longer.
- Take lots of shots, as fast as possible
Anyone who’s ever learned to shoot a handgun knows that at the point the trigger releases you tend to flinch. It’s not something you really notice but you tense up in expectation of that critical moment. The dirty secret of many photographers is that they don’t click the shutter release, they HOLD IT DOWN! Snap, snap, snap, snap, goes the camera over and over. They do this because of that “flinch reflex. When you want to get a good clear shot, take lots of rapid fire shots. You’ll quickly see that the best shot is rarely the first or the last. If you are on an iPhone camera then hold the button down and (depending on your model) the camera will keep taking photos over and over in rapid succession. This little trick is key to getting that super focused, super sharp image.
Rule 3 for Great Aviation Photos: Where do I put the camera?
You need to know the rules so that you can properly break them. So here is a classic rule for you to first master, then break. The most interesting composition for a photo is one where you see the most angles possible of your subject with foreground and a textured background.
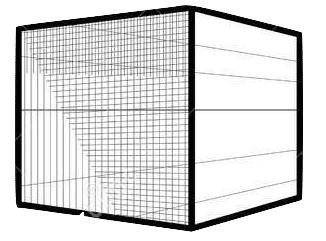
Let’s picture it. Imagine a cube sitting on a table. The cube is your subject. If you place the camera on the same level as the cube, and directly centered, you will see only one single side of the cube:

If you move the camera to the left you grab two sides of the cube:
If you then raise the camera up a couple inches you grab a third side and thus, the most possible sides to see. According to the “rule”, that is the most interesting placement of the camera for a photo of a cube.
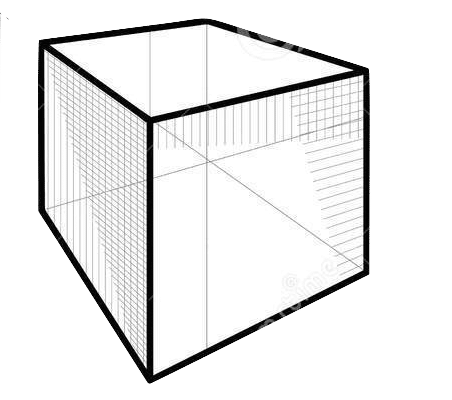
Add foreground, such as other cubes, close enough to the lens that they are out of focus and slightly obscuring the shot of the main cube. Better right?
Now add a background of colored boxes and you have applied all the rules of composition to generate an “interesting” photo, at least compositionally. Personally, I don’t care about cubes, so… already broke rule #1 and although I might be able to sell this photo on iStock, I probably would not hang it in my hangar and neither would anyone else.
Rule 4 for Great Aviation Photos: Lighting is about obscurity
You’ve probably been told that taking photos in the early morning or the evening gets that wonder of “magic hour” and your photos will always be great. Well, that’s not totally untrue, however, understanding why this seems to work is more important to someone who wants to become better.
Take a photo of an object at noon and the light falls from nearly directly above. Thus the shadows are minimal if existent at all. In the evening, when the sun is low, the shadows are long and unavoidable.
It’s not the color or the intensity of the light that makes magic hour so great (example: morning light is blue-ish and brighter, evening light is gold-ish and dimmer) but rather the existence and character of the shadows. We see things in relation to their contrast, meaning if a thing is in total darkness we don’t see it, and likewise if a thing is in absolute light we also don’t see it.
Take this photo as an example. When Jim decided that this was image worthy and something he cared about, it was because the texture of the blades were more visible and present than ever before. This is because of what ISN’T lit up, in relation to what is.
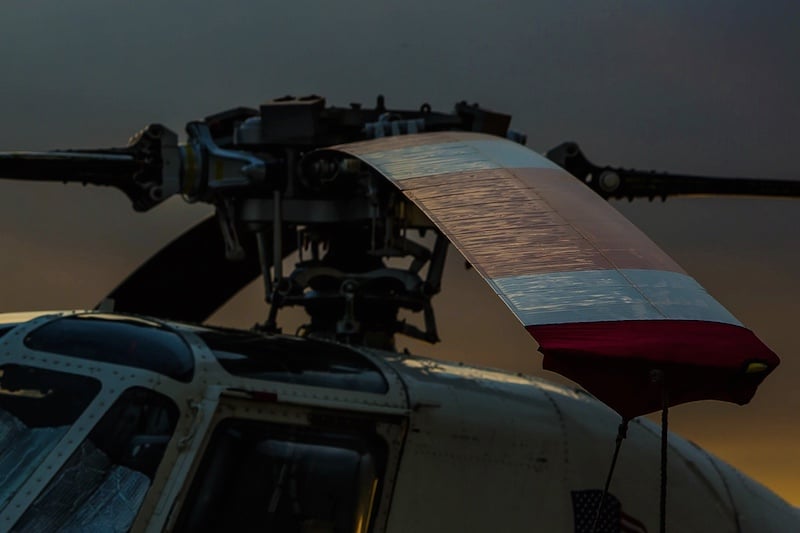
We see the texture, just as Jim felt it in the moment the image was captured because of the shadows. Try and get yourself to look for what not to light, rather than just blithely lighting up your subject. If you are taking air-to-air photos then sometimes that means waiting till the shadows cross the fuselage in that perfect way that speaks to you and then holding that shutter release down till the shadows move past that perfect point. Obscurity is the art of lighting, and if you master that thought, you can take great photos even in the harsh light of noon-day because you will be able to place the camera in order to place the shadows.
Rule 5 for Great Aviation Photos: It’s the Indian, not the arrows.
I cannot express how idiotic it is to go spend more money on gear thinking it will make you a better photographer. That’s like saying, you’d be a better pilot if you only had a twin-engine aircraft.
The truth (in my experience) is that you pick the gear (camera in this case) that is right for the mission. If your mission is Instagram, then the smartphone camera is perfect! Your adjustment apps found on the phone are made for those cameras and are also perfect. Here are some suggestions I love for use of the iPhone camera and Instagram publishing:
ProHDR X
Used when the contrast is too high for the regular camera to handle, often when capturing a backlight subject. I NEVER use this for actual HDR effect, just for the increased dynamic range. In fact, I work hard to undo any HDR effect (as thought of in the typical sense) after the fact.
Camera Awesome
This has compositional guides like the Golden spiral and rule of thirds grid overlays. Sometimes those just help!
Snapseed
This is by far my favorite app for adjusting the image to better reflect what I saw when I took the image. I never use any of the Instagram tools.
Vintique
Rarely used, but always explored, this set of filters is great for creating a vintage mood. I almost never like a “filter” but when it works for what I am after it works like gangbusters. So it’s on my recommended list.
If your mission is to make printable posters, then the smartphone camera isn’t right and you need a DSLR or 35mm camera. If your mission is to open an art gallery and display your photography or to shoot high-end photos for a “big time” client then you might consider a large format camera such as a 65mm.
The point is that it’s not your gear that makes your photos great nor does your gear limit your photo taking ability. Know your mission and choose your gear for that mission. Know the rules and master taking photos that move you, inspire people that share your sentiment, and ANY camera will be an effective tool in your hands.
This article was intended to be helpful to those who are just starting out taking great aviation photos and want to get better. If you would like more in-depth articles please let us know by clicking here and we would be happy to write more on the subject or address any specific questions you have.
Additional resources:
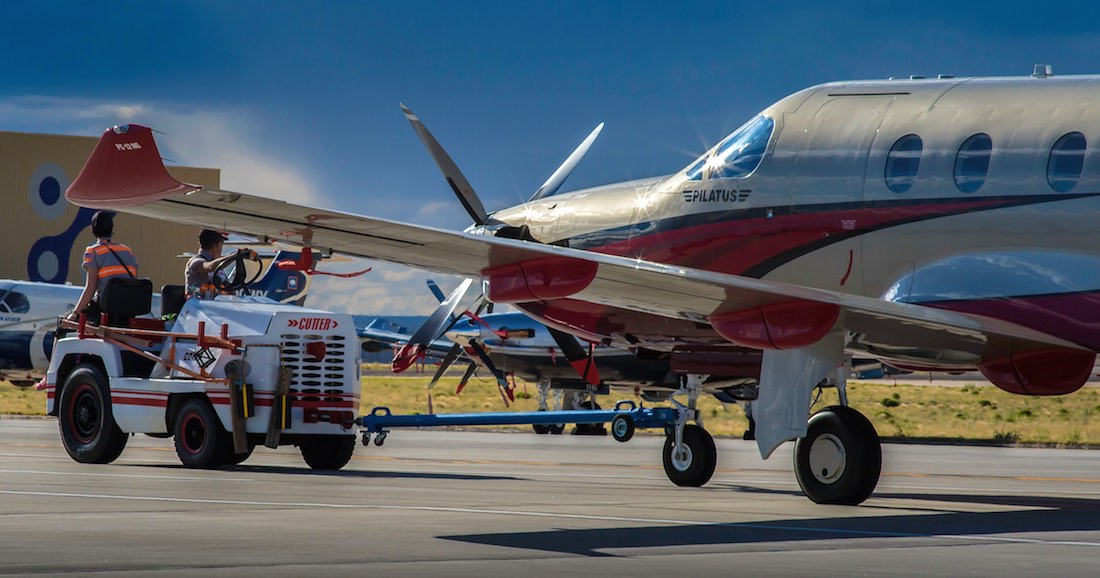
Some of the Pilatus photos from POPA 2015 – by Disciples of Flight